


How to install the shower head? What precautions? This is not just a matter of home decoration. In the course of daily use, there may also be things that need to be updated and replaced. Therefore, if you learn more about this knowledge, you may be able to use it when it is.
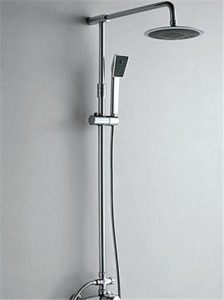
The installation of the shower head requires technology and meticulousness, but the whole process is not complicated.
1. Read the manual and determine the punching position. Before installation, it is not too much to browse through the installation matters.
2. Measure the size from left to right, up and down, and find the best position to install the shower. The left and right direction should be in the middle of the left and right walls of the bathroom, and the vertical direction is based on the position of the faucet.
3. According to the specific height, draw the installation position, height, etc. of the shower on the wall. After determining the fixed position below, start to find a way to locate the position of a fixed point above, or use a pencil to identify it.
4. After wrapping the two elbow joints with the raw material tape, use an adjustable wrench to tighten them on the water outlet joints in the two installation holes on the wall. After tightening, ensure that the center distance between the two elbow joints is 150mm.
5. Put the two decorative covers on the elbow joint.
6. Insert the installation washer into the elbow joint, and tighten the installation nuts on the two elbow joints with a wrench to fix the faucet on the wall.
7. Drill three holes with a diameter of 6mm and a depth of 35mm at a position about “H” from the faucet outlet joint.
8. Drive expansion tubes into the mounting holes respectively, and fix the wall mount to the wall with self-tapping screws. Note: The wall seat must be on the same center line as the faucet outlet connector.
9. Wrap the faucet with a cloth before drilling to prevent the faucet from being soiled and bruised.
10. The height “H” needs to be determined according to the actual product during actual installation.
11. Insert the sealing ring into the lower end of the switching valve.
12. Tighten the lower end of the switching valve and the upper end of the faucet through threads.
13. Wrap the faucet with a cloth before drilling to avoid the faucet from being soiled and scratched. Note: Be careful not to damage the electroplating surface when tightening with a wrench.
14. Tighten one end of the shower rod and one end of the switching valve through threads (the end of the column shower rod must have a sealing ring).
15. Then put the decorative cover on the other end of the shower rod, then insert that end into the wall seat, lock each end with three setscrews, and finally push the decorative cover to the wall.
16. After installation, turn on the water inlet switch and rinse the pipeline thoroughly.
17. Connect the nut end of the shower hose to the joint behind the switching valve body, connect the nut to one end of the hand shower and insert it into the shower seat (Note: The two ends of the shower hose must have washers.)
18. Screw the top spray onto the shower rod.
Although there are many steps, the whole process does not require too much technical content. It should be noted that the installation height must be suitable for the daily habits of users. In addition, after the installation is completed, shake the shower lever and turn the faucet to confirm that the installation is firm, the water is smooth and there is no water leakage.